

Direct code editing is intended for seasoned developers. For most changes, work with the Zite agent so it can update related files and keep the project consistent.
Open code view
- Open a project.
- Click the project or app name in the top-left corner.
- Under Workspace, select Code.
Understand the monorepo
All apps in a workspace are bundled into the same project codebase. The file tree commonly includes: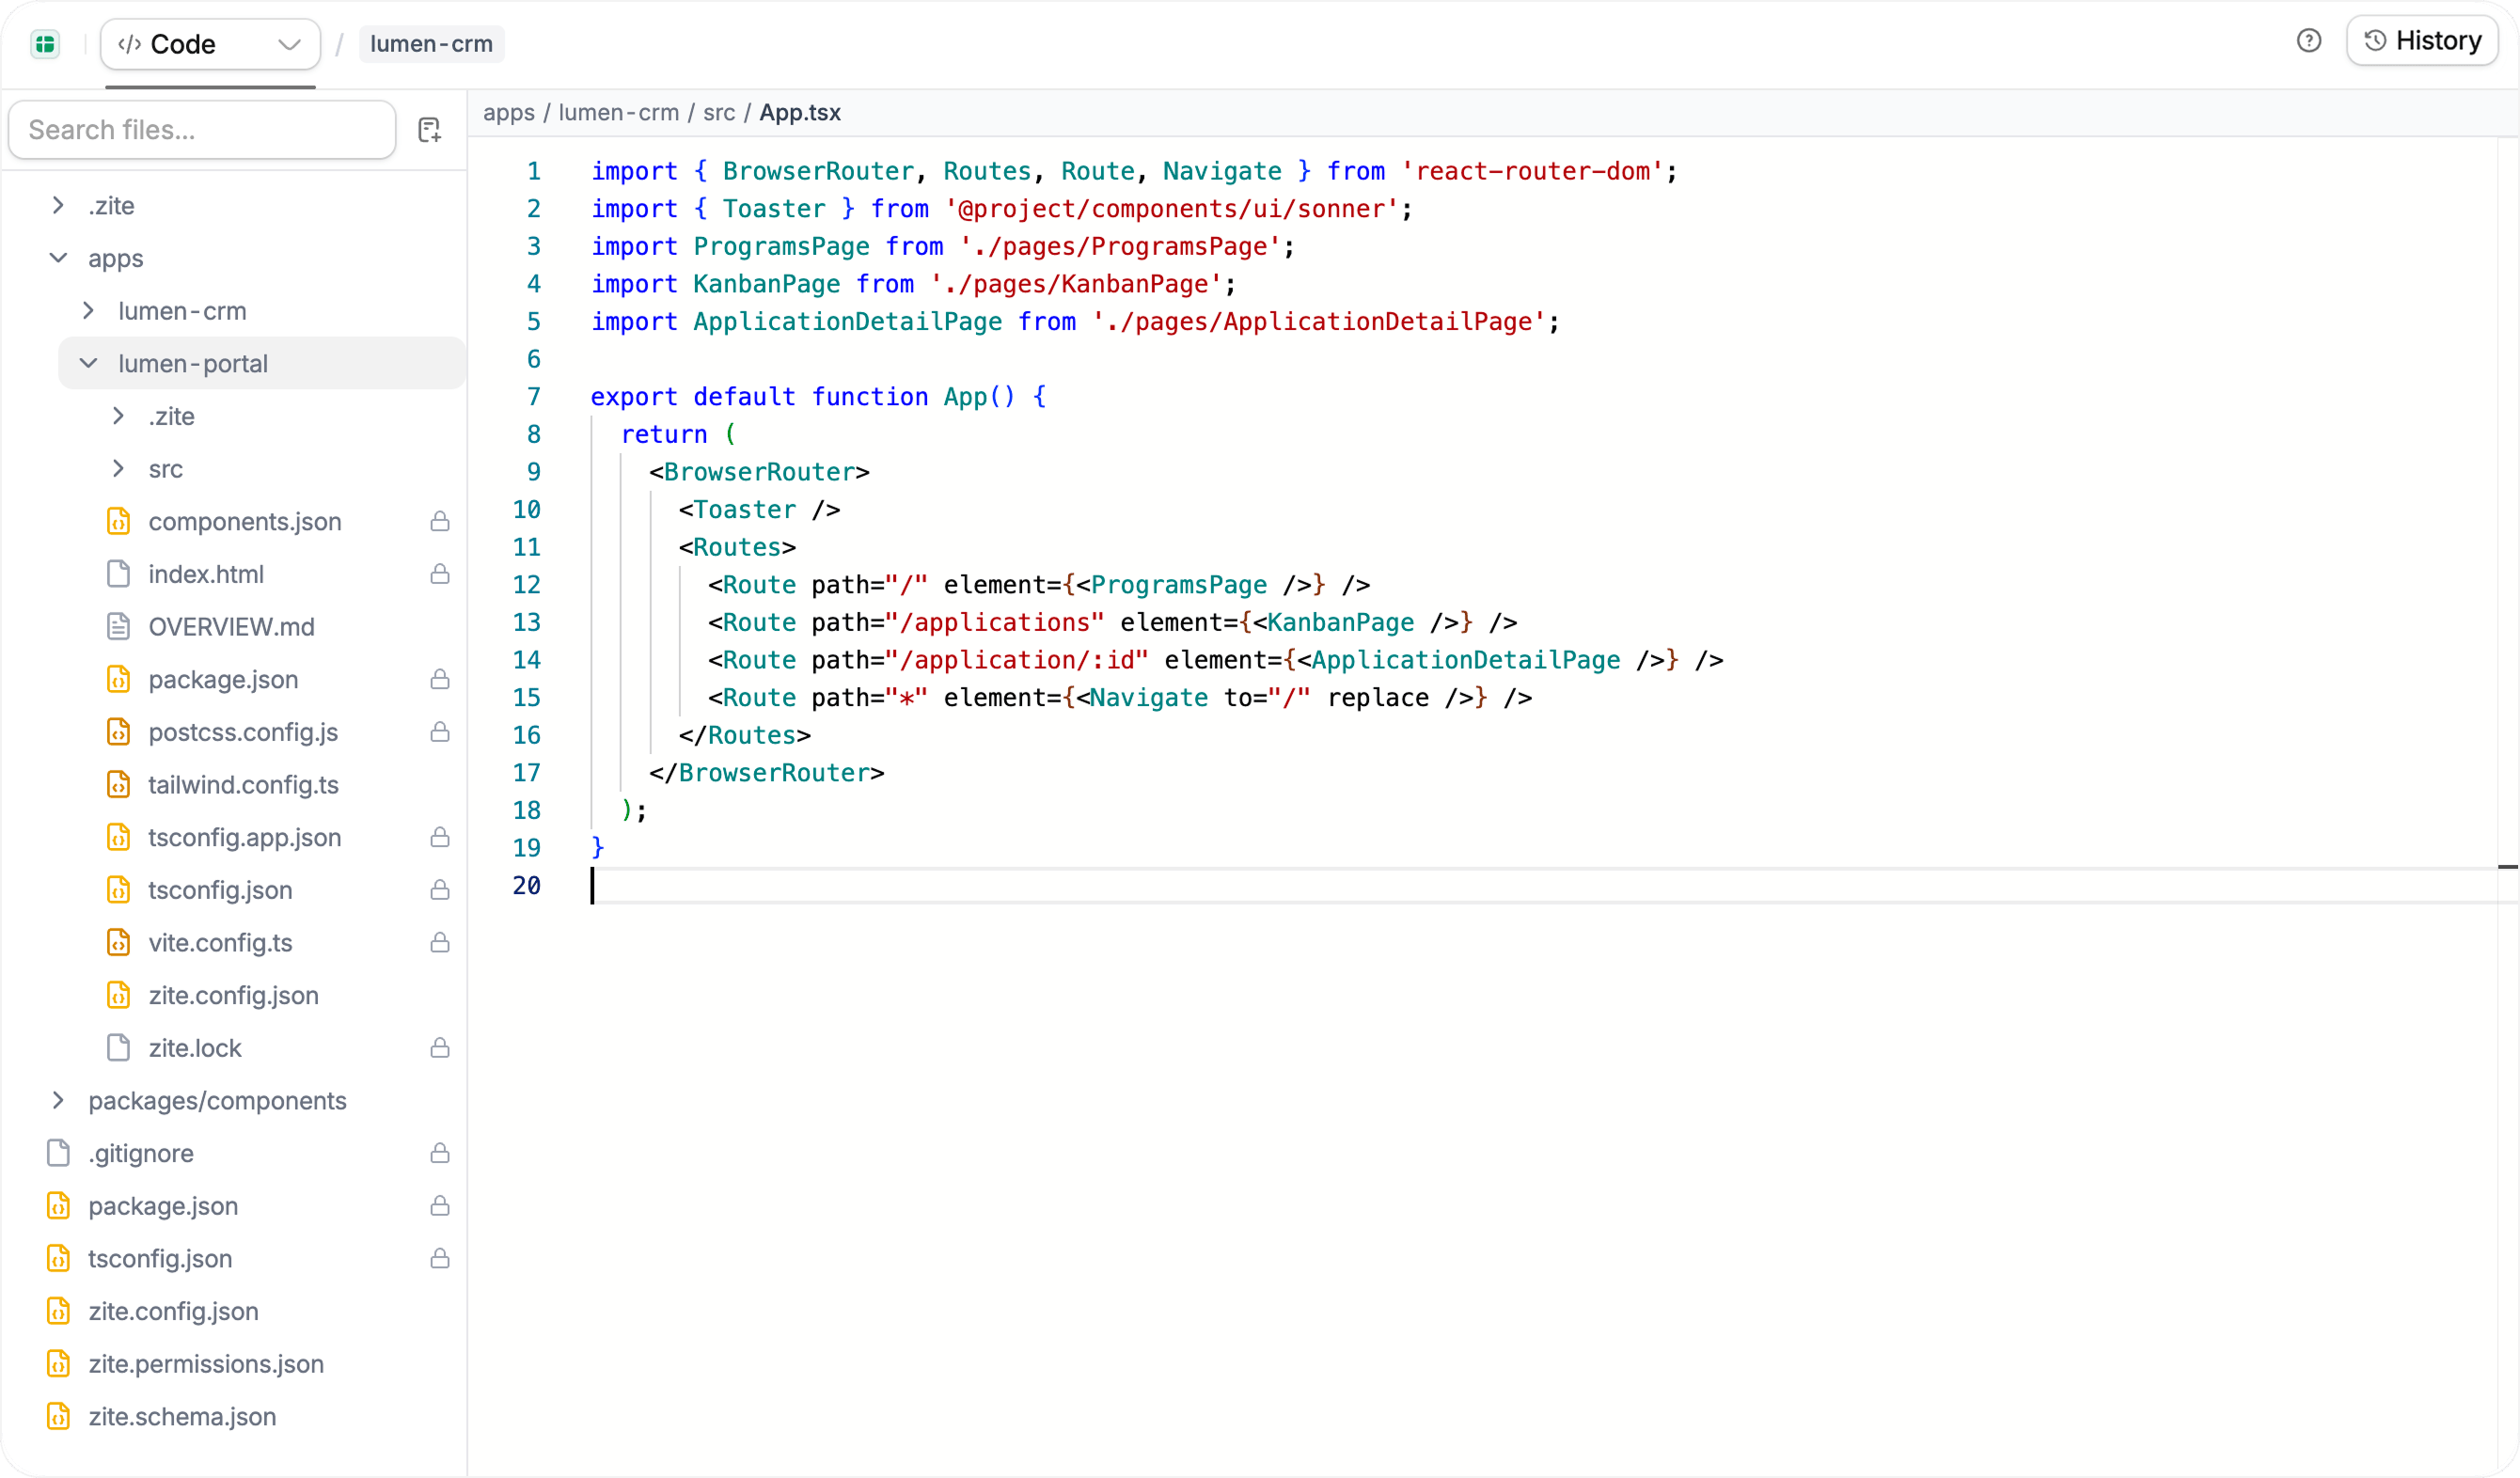
View and edit code
Click a file in the tree to open it, then edit the code directly. Files with a lock icon are managed by Zite and cannot be edited from Code view. Direct edits are most useful when you know which file needs to change and are comfortable with React, TypeScript, and the project structure. For changes that cross multiple files or apps, ask the Zite agent to make the update instead. To add a file, click the new-file icon beside the search field, then enter its name and extension. Follow the conventions already used in that app or package.Review code history
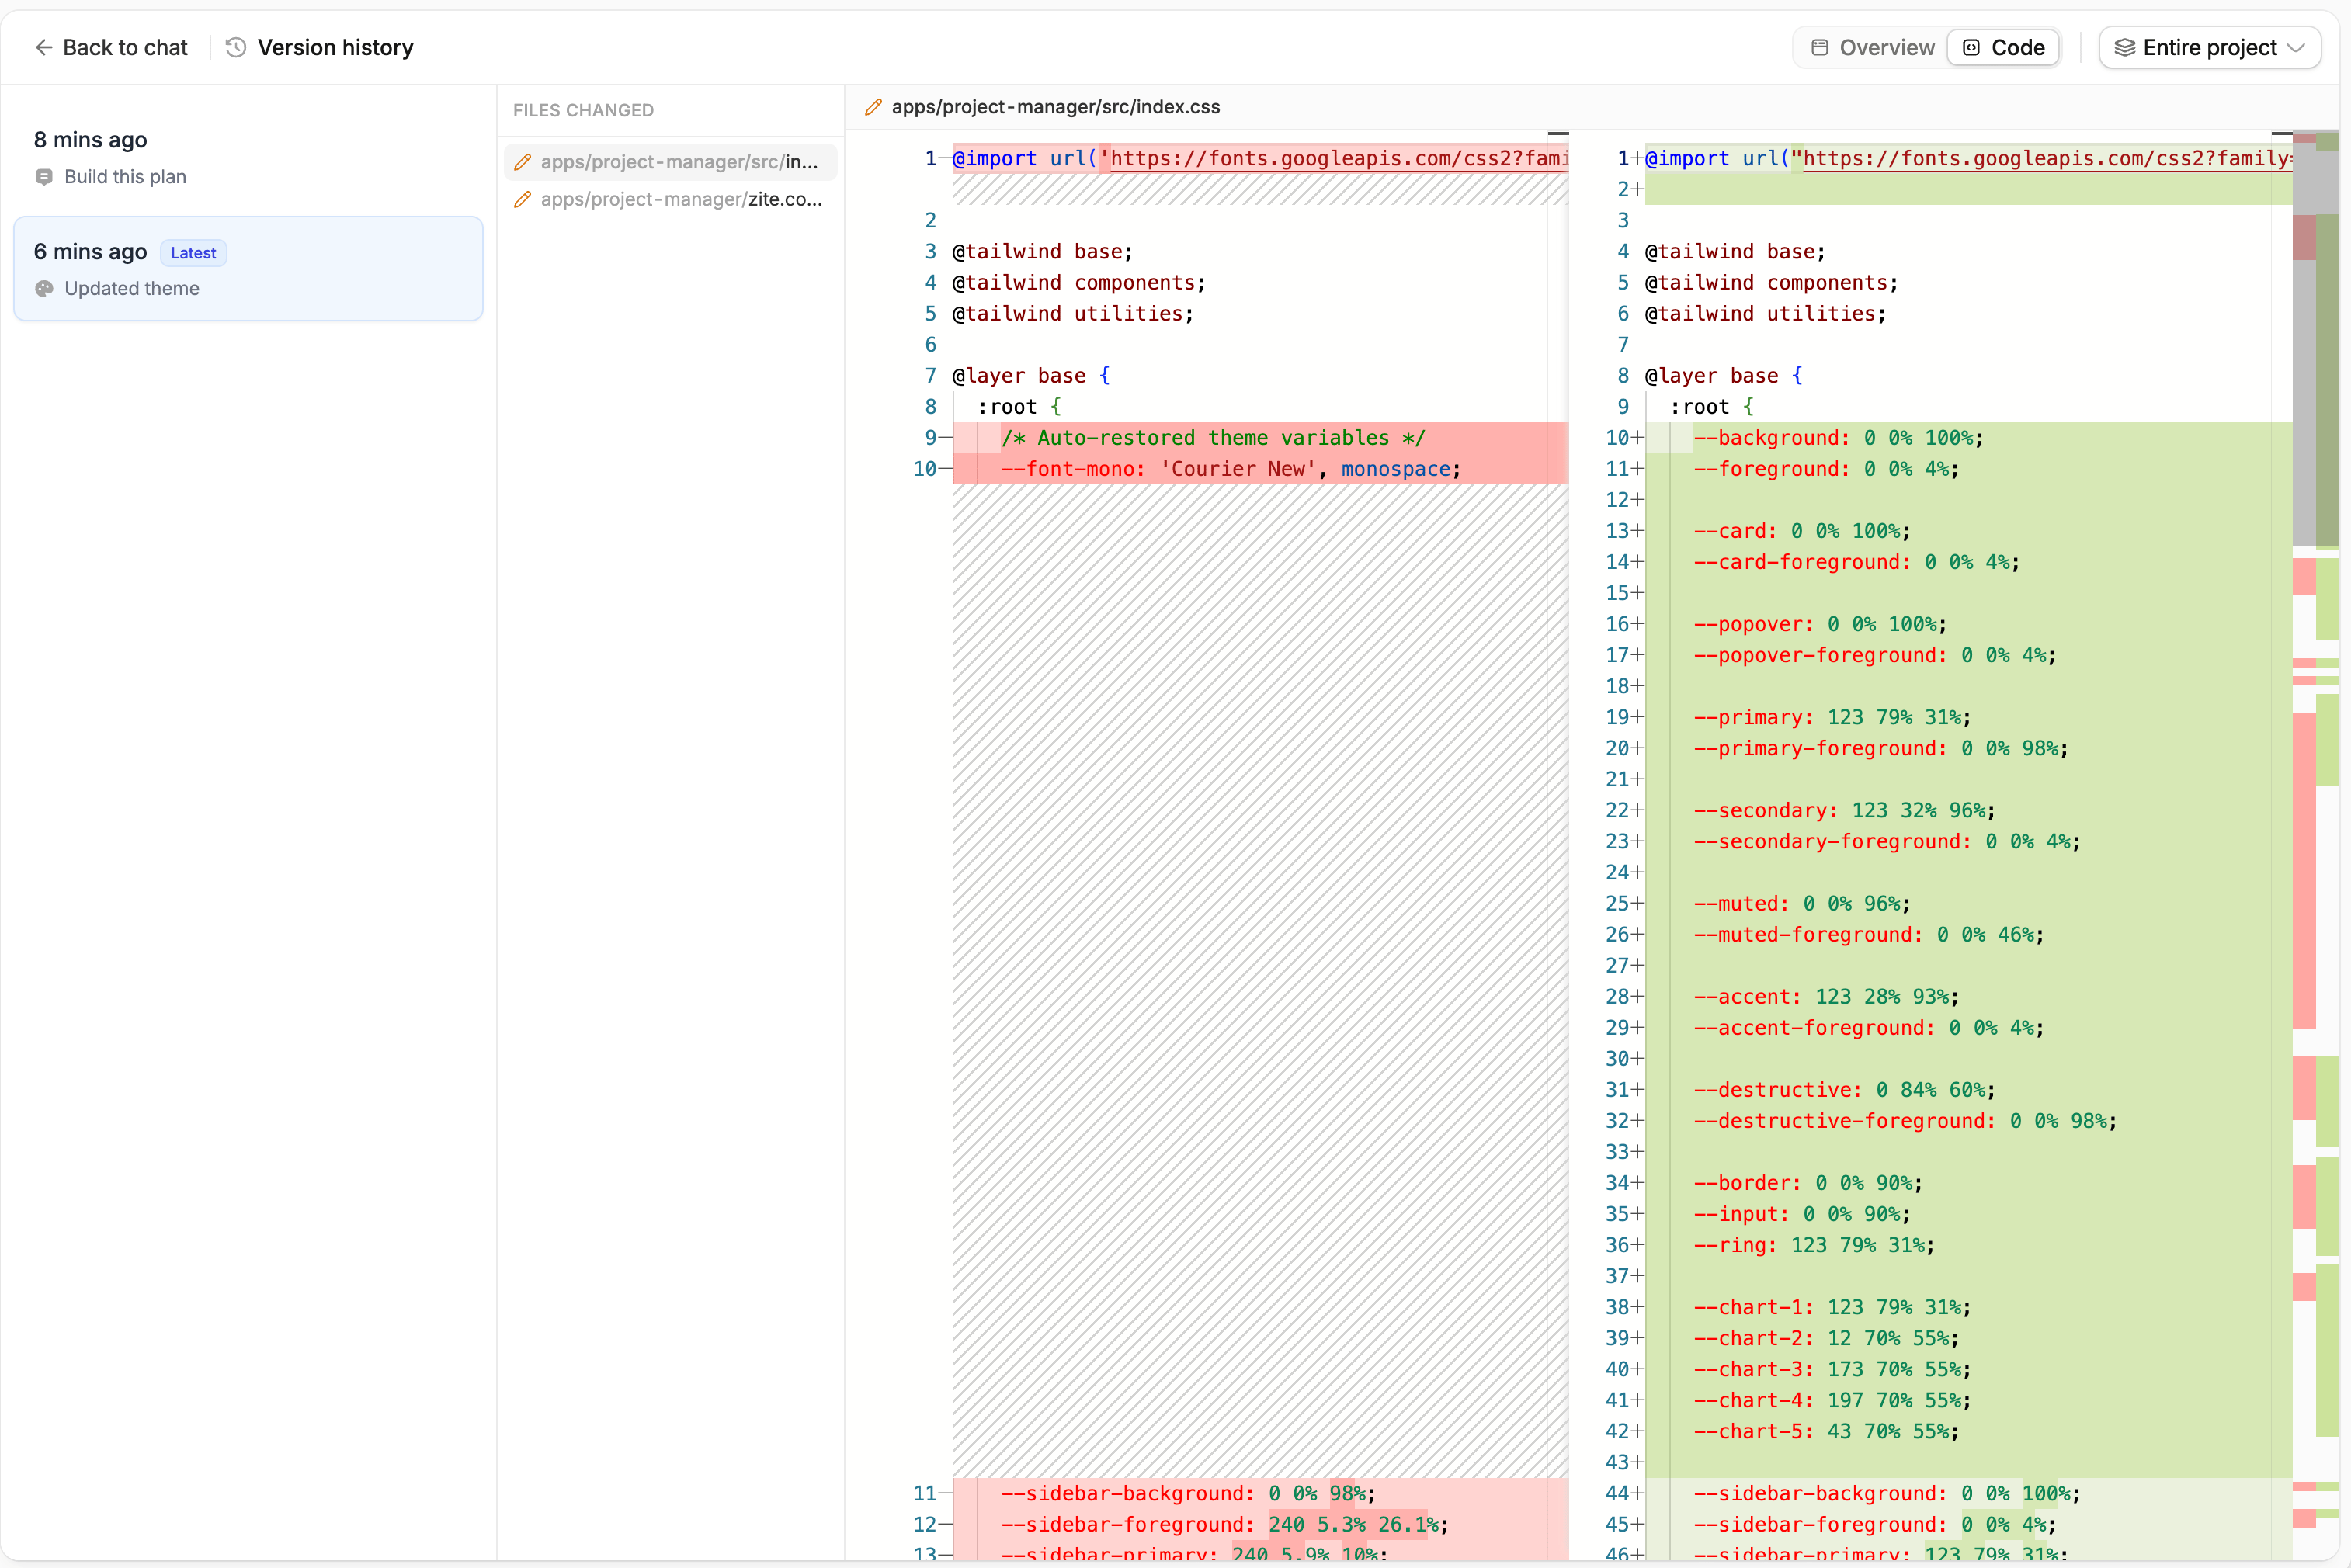
Zite keeps a Git-backed history of meaningful project changes. Use it to connect code updates to prompts or agent actions and see exactly which files changed.- Click History in the Code view toolbar.
- Select a change from the timeline.
- Choose Code to see the files changed and a side-by-side diff.
- Use the project selector to review changes across the entire project or within an individual app.
Best practices
- Use the Zite agent for changes that affect multiple files, apps, or shared packages.
- Check whether code under
packagesis used by other apps before editing it. - Keep direct edits small and focused, then test every affected app.
- Use History to review the resulting diff and understand what changed.